Lead Generation Automation ด้วย n8n
ดึงข้อมูลจาก Keyword ด้วย n8n มาเก็บไว้ใน Google Sheets

Connect with me and follow our journey: Linkedin, Facebook
สวัสดีครับ! ยินดีต้อนรับกลับมาสู่ซีรีส์ AI Automation ที่ผมทำขึ้นเพื่อแบ่งปันความรู้ในการสร้างระบบอัตโนมัติให้ทำงานแทนเราได้จริง ในตอนที่ผ่านมาเราได้เรียนรู้ตั้งแต่การติดตั้ง n8n, การสร้าง AI Agent, ไปจนถึงการเชื่อมต่อ Google Services และสร้าง Mini Project สนุก ๆ กันไปแล้ว
- make.com → EP.1: ระบบจัดการ Leads อัตโนมัติ
- make.com → EP.2: ระบบรายงาน Leads ที่ยังไม่ได้ติดต่อเข้า LINE
- make.com → EP.3: รวมไอเดียเด็ดพร้อม Tips & Tricks
- make.com → EP.4: สร้าง LINE Chatbot ด้วย OpenAI ผ่าน Make.com
- n8n → EP1: ทำความรู้จัก และวิธีติดตั้ง Hosting ฉบับจับมือทำ
- n8n → EP2: มาสร้าง AI Agent ตัวแรกกันครับ
- n8n → EP3: สร้าง AI Automation ด้วย n8n + Google Docs, Sheets, Drive และ Gmail
- n8n → EP4: สร้าง Mini Project ดูดวงจากเบอร์มือถือด้วย n8n + AI
ใน EP.5 นี้ เราจะก้าวไปอีกขั้นกับหัวข้อ Lead Generation Automation หรือการสร้างระบบเพื่อค้นหาและเก็บข้อมูลลูกค้าเป้าหมาย (เช่น ชื่อ, อีเมล, เบอร์โทรศัพท์) โดยอัตโนมัติ
Lead Generation คืออะไร?
Lead Generation คือกระบวนการค้นหาและรวบรวมข้อมูลติดต่อ (เช่น ชื่อ, เบอร์โทร, อีเมล) ของกลุ่มลูกค้าเป้าหมายที่เราสนใจ เพื่อนำไปใช้ต่อยอดด้านการตลาด การขาย หรือการสร้างฐานลูกค้าใหม่
ในบทความนี้ ผมจะสาธิตการสร้าง Workflow ด้วย n8n (Localhost) โดยใช้ 3 องค์ประกอบหลัก:
- Google Custom Search API → ใช้ค้นหากลุ่มเป้าหมายจาก Facebook หรือทั้งเว็บ
- HTTP Request → ดึงข้อมูลจาก URL ที่ค้นเจอ
- Google Sheets → บันทึกผลลัพธ์อัตโนมัติ
Demo 1: Facebook
- Load File ที่ชื่อ lead-fb-gen ใน VS Code
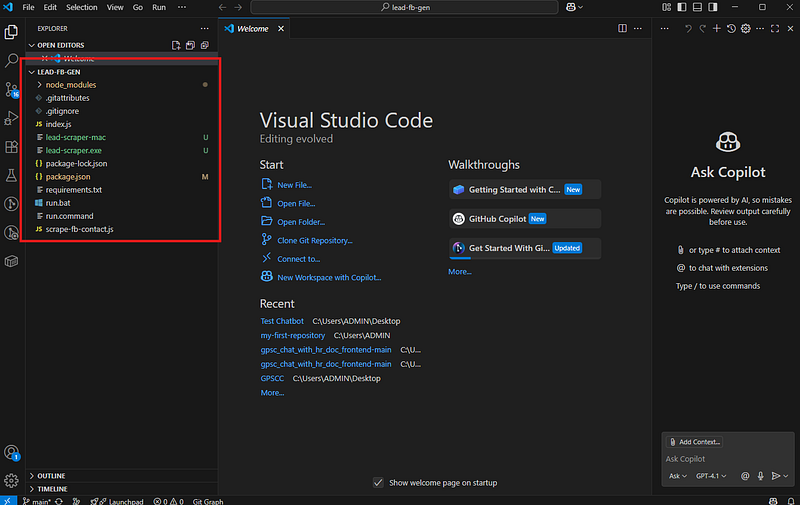
- เปิด Terminal
- พิมnpm installซึ่งเป็นคำสั่งที่ใช้สำหรับติดตั้ง dependencies ที่ระบุไว้ในไฟล์package.jsonของโปรเจกต์ Node.js (ถ้าเจอ Error อะไรลองถาม ChatGPT แล้วทำตามดู)
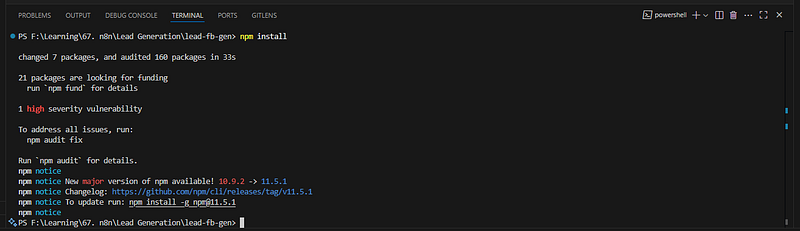
- ต่อด้วยคำสั่ง
node scแล้วกด Tab (ของผมจะขึ้นเป็นnode .\scrape-fb-contact.jsกด Enter → Server ก็จะ Run ขึ้นมา

- ไปที่ Google พิม Google Custom Search → เลือก Programmable Search Engine — Google
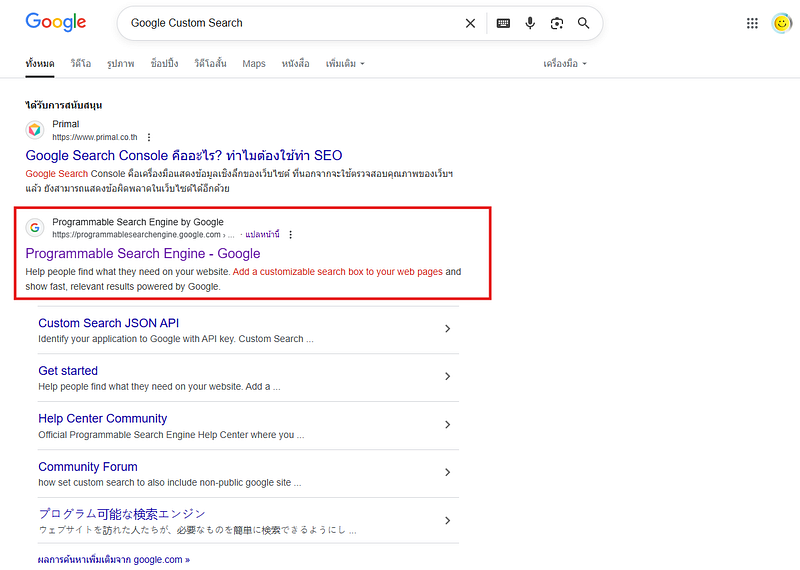
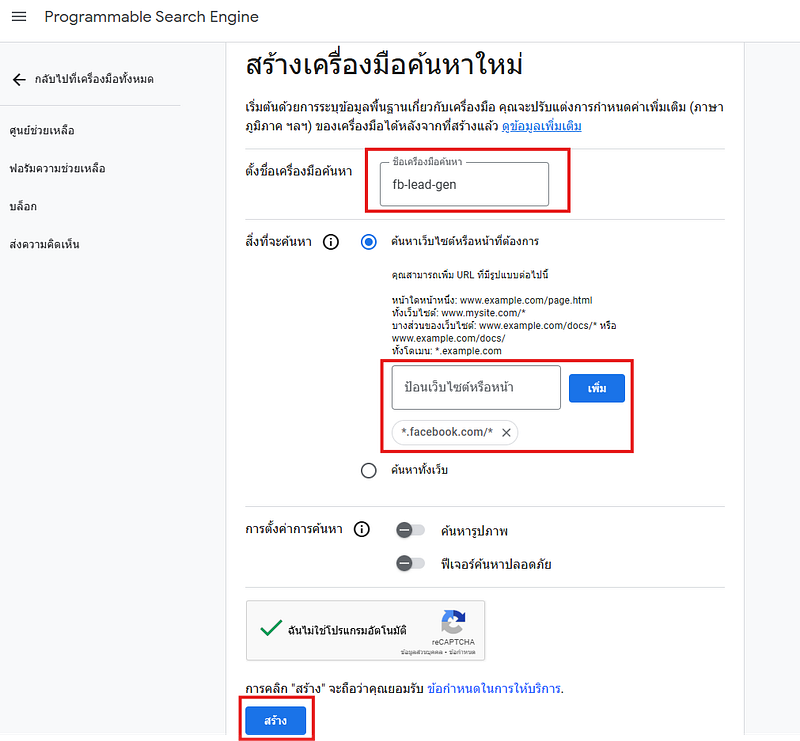
- กด Get started → กด เพิ่ม
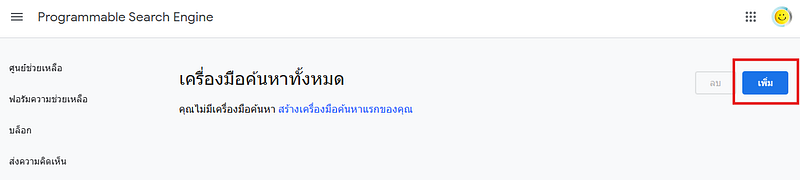
- ใส่ข้อมูลต่างๆ
- ชื่อเครื่องมือค้นหา: fb-lead-gen
- ป้อน Website หรือหน้า: *.facebook.com/*
- กด “สร้าง”
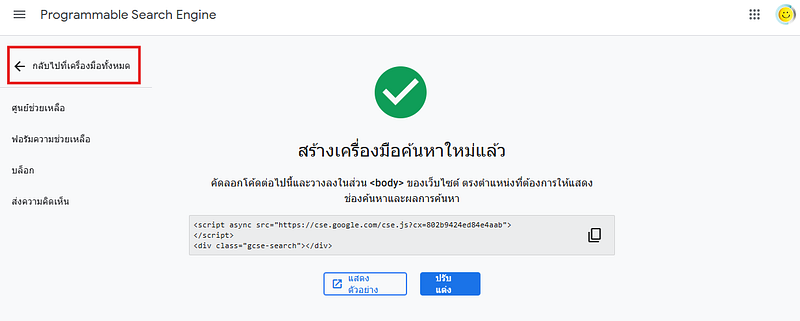
- เลือก “กลับไปที่เครื่องมือทั้งหมด”
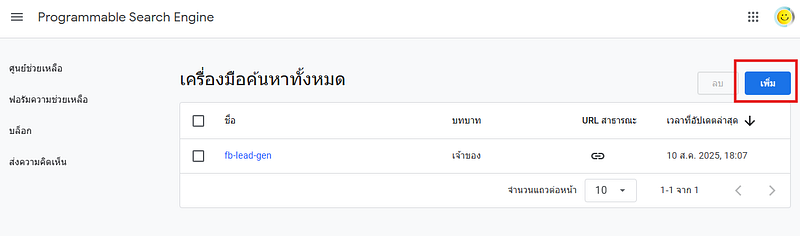
- กด “เพิ่ม”
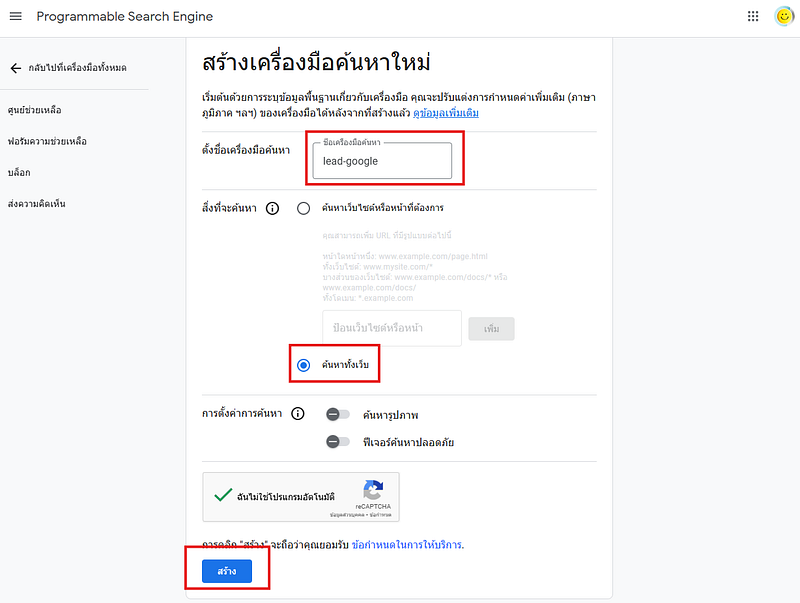
- ใส่อีกอัน
- ชื่อเครื่องมือค้นหา: lead-google
- สิ่งที่จะค้นหา: เลือก “ค้นหาทั้งเว็บ”
- กด “สร้าง”
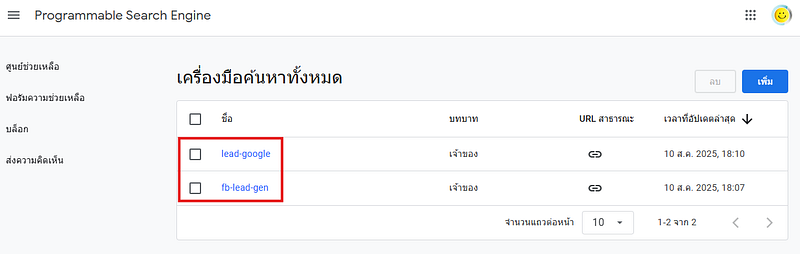
- ถ้าเลือก “กลับไปที่เครื่องมือทั้งหมด” → จะพบสิ่งที่เราสร้าง 2 อัน
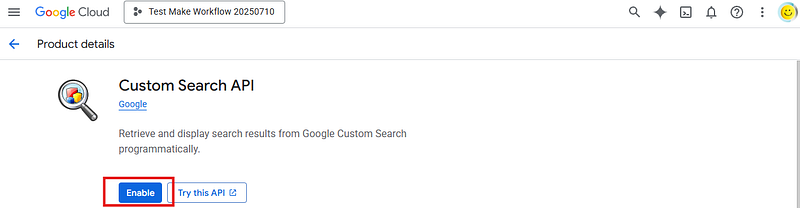
- ไปที่ Google Cloud Console → พิม Custom Search API

- กด Enable (ถ้าเจอ Manage คือถูกต้อง)
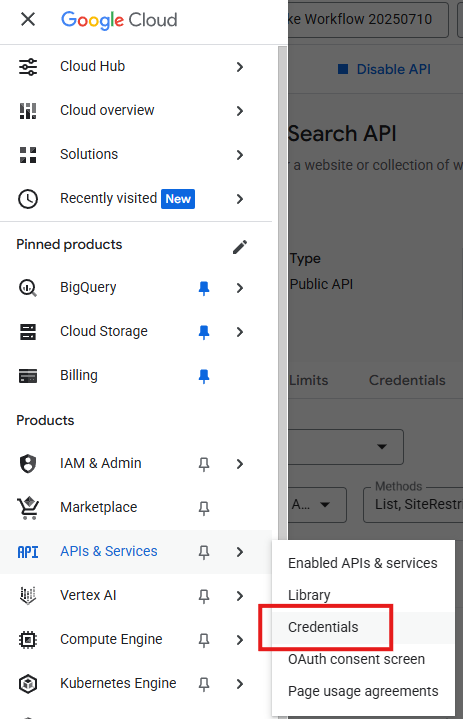
- กดที่ Hamberger Icon มุมซ้ายบน → เลือก APIs & Services → เลือก Credentials
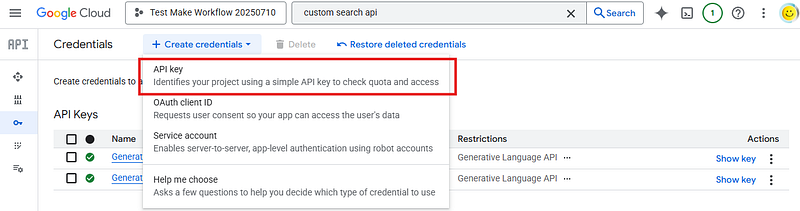
- เลือก + Create credentials → API key → Copy เก็บไว้นะ อย่าลืม
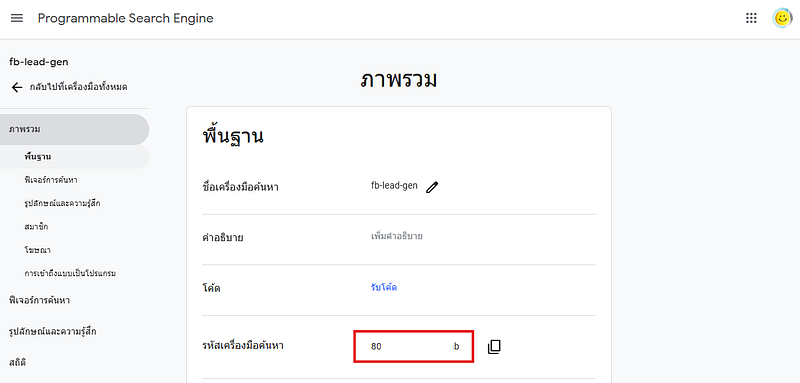
- กลับไปที่ Programmable Search Engine → เลือก fb-lead-gen
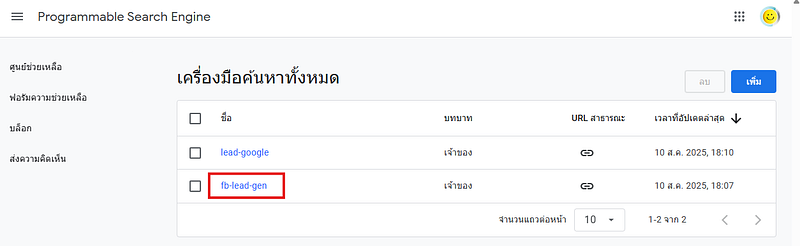
- Copy รหัสเครื่องมือค้นหา มาเก็บไว้
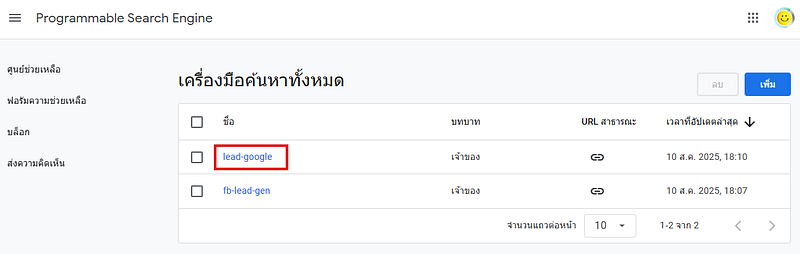
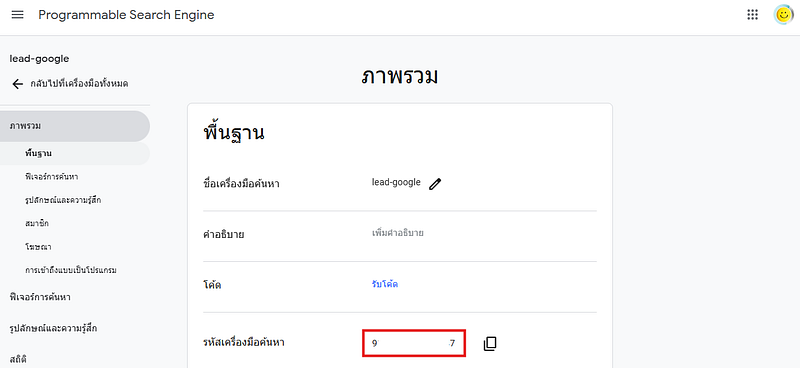
- กลับไปอีกอันนึง
- Copy รหัสเครื่องมือค้นหา มาเก็บไว้
- ตอนนี้เราจะมีรหัสผ่าน 3 ประกอบด้วย
Google API Key: Axxxo
FB CX: 8xxxb
Google CX: 9xxx7
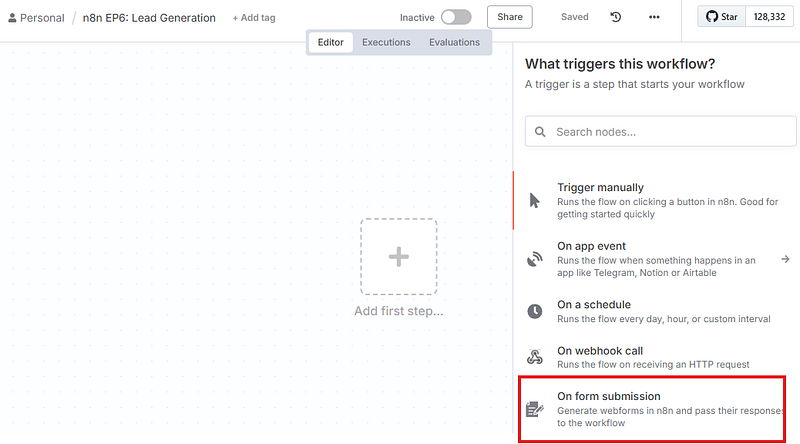
- ไปที่ n8n → Add first step → On form submission
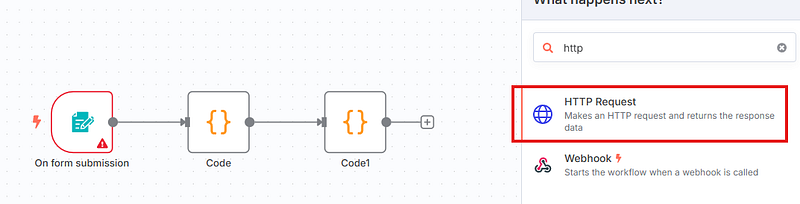
- กด Code ไปอีก 2 node แล้ว add HTTP Request
- เลือก HTTP Request → กด Expression แล้วกดขยาย
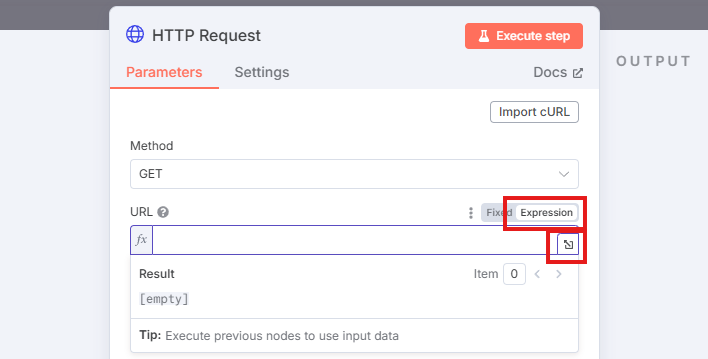
- ใส่ Code ตามนี้ลงไป
https://www.googleapis.com/customsearch/v1?
key=&cx=&q=site:facebook.com+{{
$('+').item.json['ธุรกิจที่ต้องการ'] }}+{{ $('+').item.json['จังหวัด'] }}&num=10&start={{
$json.start }}

ภาพหลังใส่เสร็จแล้ว
- add Code ไปอีก 2 node, add Loop และ add HTTP request อีกที

- เลือก HTTP Request → กด Expression แล้วกดขยาย
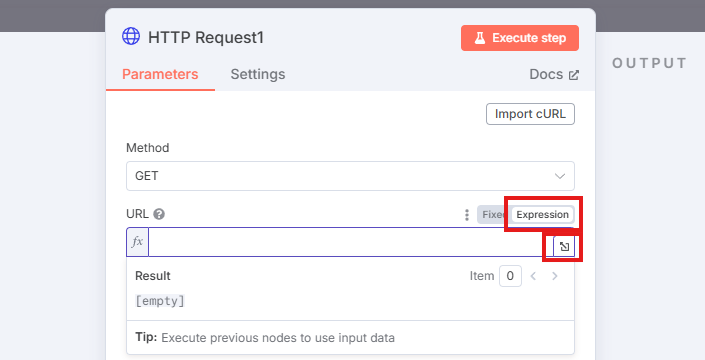
- ใส่ Code ตามนี้ลงไป
http://host.docker.internal:3000/scrape?url={{ $json.cleanedUrl }}
Note: ถ้าทำบน render ต้องแก้ไข http://host.docker.internal:3000 เป็น ngrok ของตัวเอง
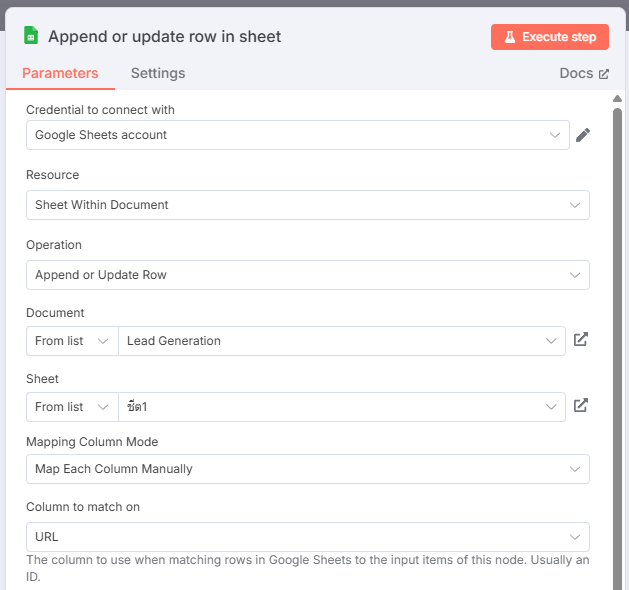
- add “Edit Fields” และ “Google Sheet: Append or update row in sheet”

ถึงเวลาตั้งค่า (configure) nodes ทั้งหมดให้เรียบร้อย
- Node: On from submission
- Form Title: Keywords
- Form Elements
— Field Name: ธุรกิจที่ต้องการ
— Element Type: Text
— Placeholder:เสริมความงาม
— เปิด Required Field
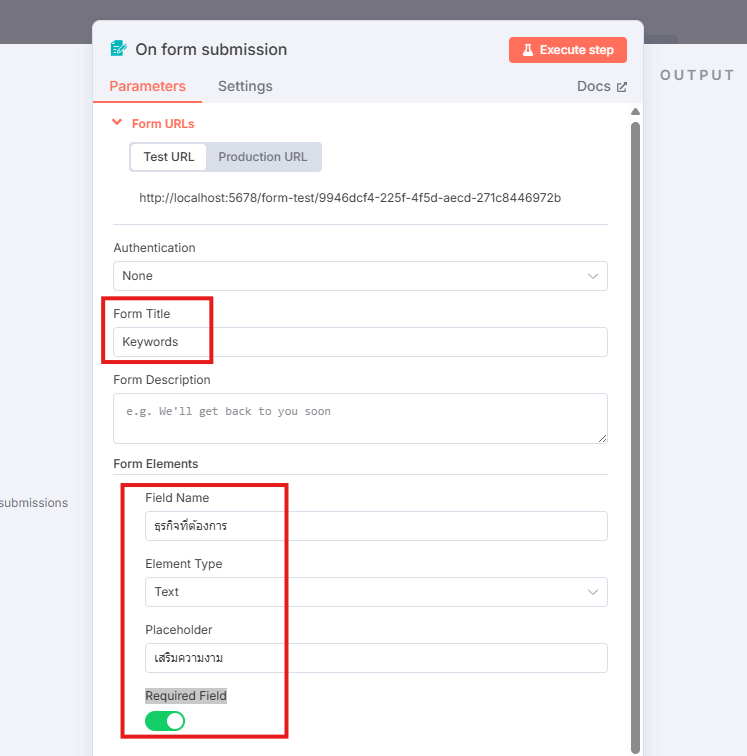
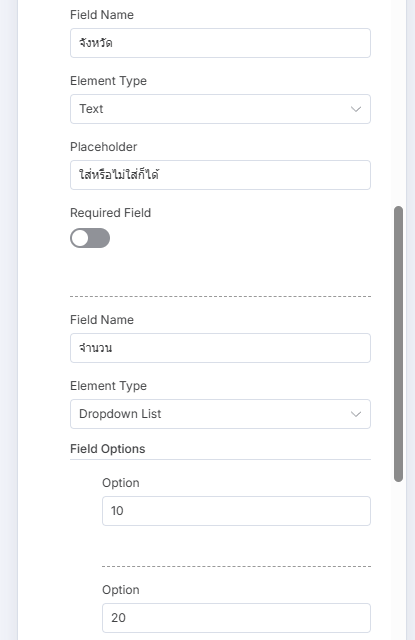
- ถ้าต้องการให้กรอกข้อมูลมากกว่า Keywords ก็สามารถเพิ่ม Element ได้ โดยกด Add Form Element
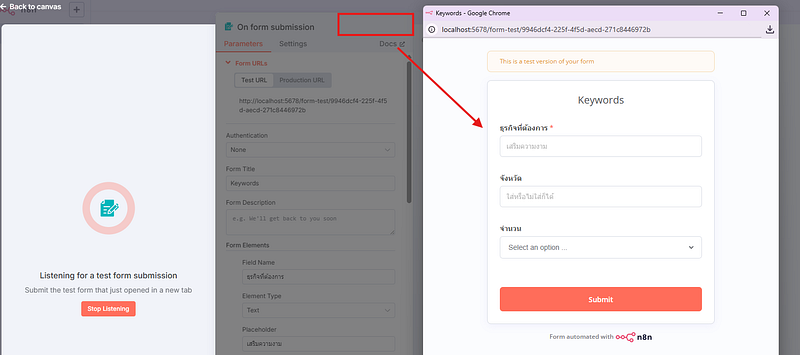
- กด Execute step จะแสดง Form ให้กรอกดังรูป
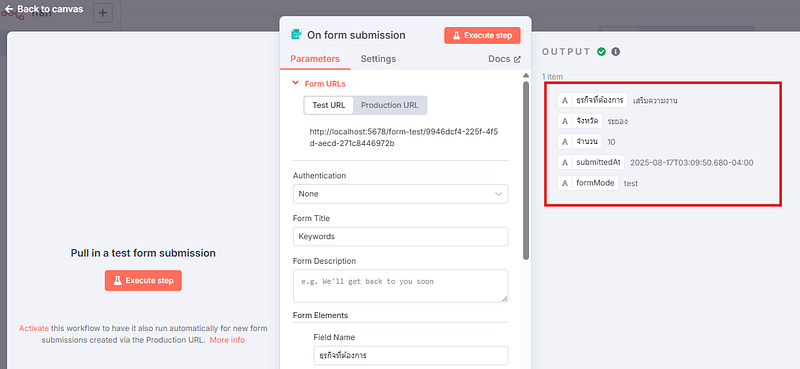
- ลองกรอกข้อมูลดู (ผมลองกรอก เสริมความงาม, ระยอง, 10) → ลองดู Output ที่ Node แรก
- ต่อไปเราจะอธิบายการทำงานของ Code แต่ละ Node กัน

- Code ใน node ที่ 2
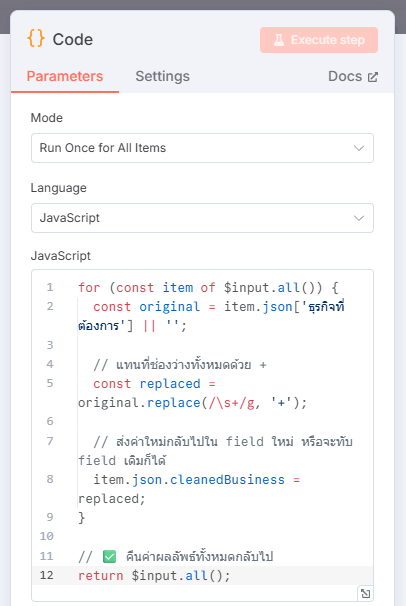
for (const item of $input.all()) {
const original = item.json['ธุรกิจที่ต้องการ'] || '';
// แทนที่ช่องว่างทั้งหมดด้วย +
const replaced = original.replace(/\s+/g, '+');
// ส่งค่าใหม่กลับไปใน field ใหม่ หรือจะทับ field เดิมก็ได้
item.json.cleanedBusiness = replaced;
}
// ✅ คืนค่าผลลัพธ์ทั้งหมดกลับไป
return $input.all();
ในกรณีที่มีคนกรอกฟอร์ม มามากกว่า 1 Keywork เช่น “เสริมความงาม กวดวิชา” code จะเปลี่ยนให้เป็น “เสริมความงาม+กวดวิชา”
- Code ใน node ที่ 3
const requestedAmount = parseInt($json["จำนวน"], 10) || 10; // ดึงค่าจากฟอร์ม (default 10)
const resultsPerPage = 10;
const output = [];
for (let i = 1; i <= requestedAmount; i += resultsPerPage) {
output.push({ json: { start: i } });
}
return output;
Node 3 เอาค่าจำนวนที่ผู้ใช้กรอกมา แบ่งเป็นรอบๆ (ทีละ 10) แล้วสร้าง output หลายก้อน โดยแต่ละก้อนบอกว่าจะเริ่มที่ record ลำดับที่เท่าไหร่ เช่นถ้ากรอก 20 รอบแรกจะเริ่มที่ 1 รอบ 2 จะเริ่มที่ 11
- HTTP Request ใน node ที่ 4
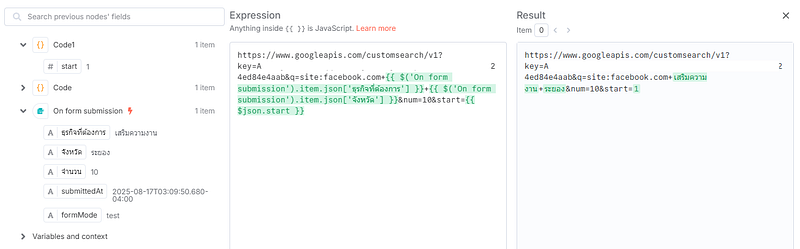
ทำการเชื่อมต่อกับ Google Custom Search ด้วย API และ Search AI ที่เราทำการสร้างไว้
- Code ใน node ที่ 5
const output = [];
for (const item of $input.all()) {
const items = item.json.items || [];
for (const result of items) {
output.push({
json: {
url: result.link || '',
title: result.title || '',
snippet: result.snippet || ''
}
});
}
}
return output;
เป็นการแปลงรูปแบบข้อมูล เพื่อให้เข้าใจง่ายและพร้อมใช้ต่อ
- Code ใน node ที่ 6
const output = [];
for (const item of $input.all()) {
const url = item.json.url || '';
// 1) decode %E0%B8... -> ตัวอักษรจริง
let cleaned = decodeURIComponent(url);
// 2) ตัด query string ออก (ทุกอย่างหลัง ?)
cleaned = cleaned.split('?')[0];
output.push({
json: {
originalUrl: url, // เก็บไว้เผื่ออ้างอิง
cleanedUrl: cleaned, // URL ที่ผ่านการ clean แล้ว
title: item.json.title || '',
snippet: item.json.snippet || ''
}
});
}
return output;
เป็นการ Clean URL ให้อ่านง่ายขึ้น
- Loop ใน node ที่ 7 ทำหน้าที่ส่งสิ่งที่เราอยากค้นหาเข้าไปทีละ 1
- HTTP Request ใน node ที่ 8 ทำหน้าที่ ส่งข้อมูลที่เราต้องการกลับมา ซึ่งคือ Email กับเบอร์โทร
Note: การ Run Node นี้ต้องเปิด Server 3000 ซึ่งถูกสั่งให้เปิดใน VS code ด้านบนนะ
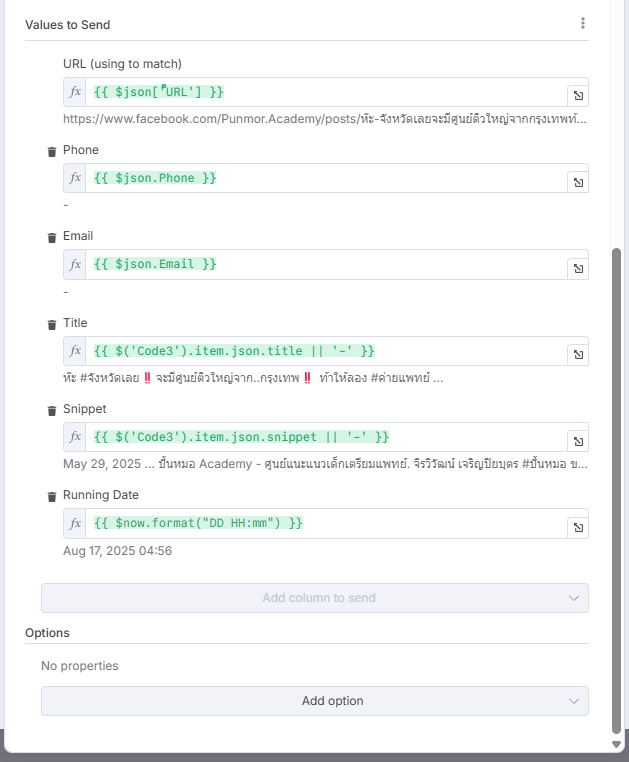
- Edit Fields ใน node 9 ทำหน้าที่เลือกข้อมูลที่เราต้องการ เพื่อจะส่งเข้า Google Sheet
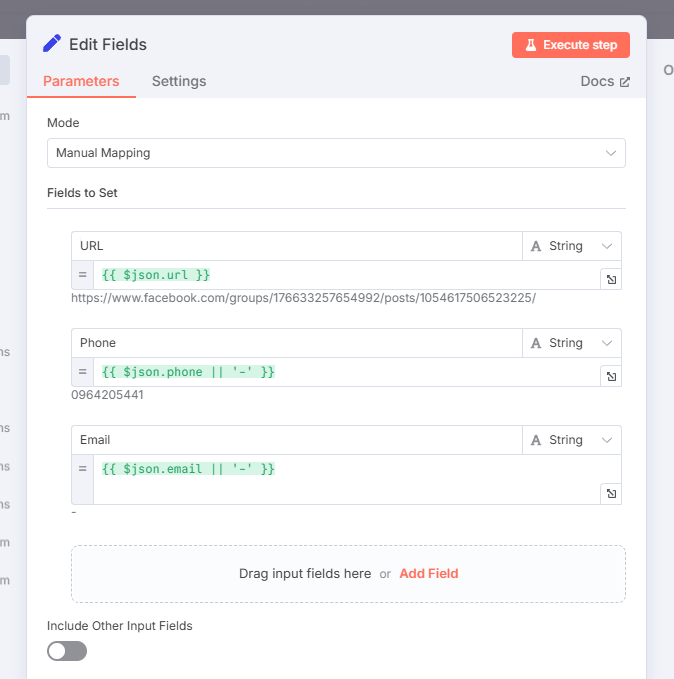
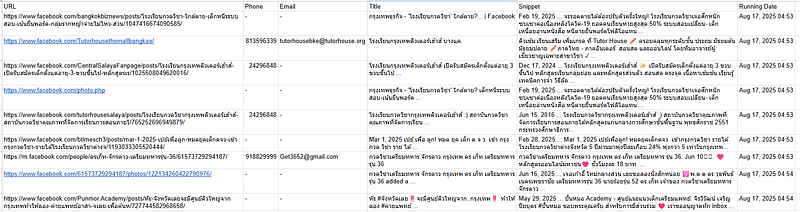
- Google Sheet ใน node 10 เลือกสิ่งที่อยากได้เข้ามาแสดงผล
- Output ที่ได้
Demo 2: Google
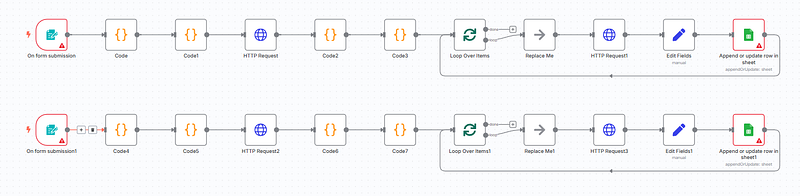
- copy ทั้งหมดลงมาอีกชุดนึง
- ใน HTTP Request แรก → กด Expression แล้วกดขยาย
- เปลี่ยน code ด้านล่างจาก FB CX เป็น Google CX
https://www.googleapis.com/customsearch/v1?
key=&cx=&q=site:facebook.com+{{
$('+').item.json['ธุรกิจที่ต้องการ'] }}+{{ $('+').item.json['จังหวัด'] }}&num=10&start={{
$json.start }}
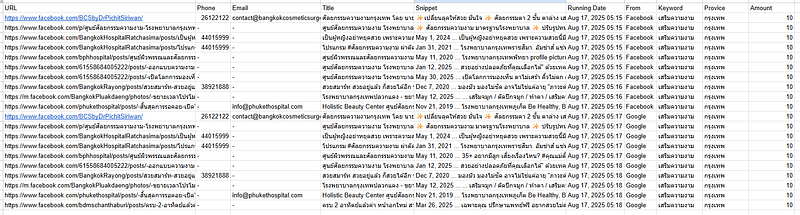
- ผลลัพธ์ที่ได้ (หลังปรับแต่งและเพิ่ม Parameter ต่างๆเข้าไป)
Key Takeaways
- Lead Generation คือหัวใจของการสร้างฐานลูกค้า → การทำให้เป็น Automation ช่วยประหยัดเวลาอย่างมาก
- Google Custom Search API สามารถกำหนด Scope ได้ว่าจะค้นหาเฉพาะเว็บไหน
- การเชื่อม n8n + API + Google Sheets ช่วยให้ได้ Workflow ที่ครบตั้งแต่ค้นหาจนเก็บผลลัพธ์
ใน EP.5 นี้ เราได้เรียนรู้การสร้างระบบ Lead Generation Automation ที่สามารถค้นหา Facebook/Google → ดึง Email & เบอร์โทร → เก็บลง Google Sheets ได้ครบจบใน Workflow เดียว เหมาะสำหรับใครที่ต้องการสร้างระบบช่วยทีมขายและการตลาด
Data Science Explore the world of data science with Donato_Story
Dashboard Discover the power of data visualization with Donato_Story
Donato_Journey Join me on my journey (Thai version)
Course_Review Discover the training courses with Donato_Story (Thai version)
Let’s Connect!
Your thoughts and feedback are invaluable. Feel free to share them in the comments or connect with me on
- Medium: medium.com/donato-story
- Facebook: web.facebook.com/DonatoStory
- Linkedin: linkedin.com/in/nattapong-thanngam
Originally published on Medium
Related

CSS 101
เปลี่ยนหน้าเว็บ HTML ธรรมดา ให้สวยสะดุดตาด้วย CSS (ฉบับมือใหม่)

Everyday Text Use Cases with ChatGPT (EP2)
การประยุกต์ใช้ Generative AI ในชีวิตประจำวัน

GenAI Tools & Tips Beyond ChatGPT (EP2)
พามารู้จัก Generative AI ฝั่ง Google

GenAI Tools & Tips Beyond ChatGPT (EP4)
ตัวอย่างเครื่องมือ AI สำหรับงาน: สไลด์, Infographic, ดนตรี และผู้ช่วยการเรียนรู้